Quick Answer: How Hard Is the Hike?
| Factor | Details |
|---|---|
| Distance | 4 km round trip |
| Summit elevation | 233 meters (764 feet) |
| Stairs | Long stretches of stone steps (no official count) |
| Time needed | 2-3 hours round trip |
| Difficulty | Moderate (lots of stairs) |
| Fitness required | Average – can walk 5km comfortably |
In simple terms: If you can climb 50 flights of stairs with breaks, you can do this hike.
Trail Overview
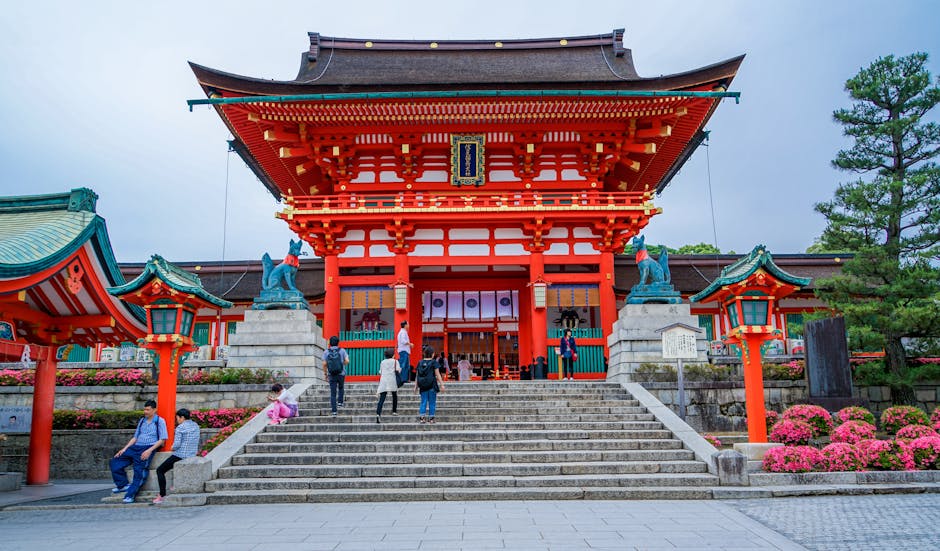
START: Main Hall
    ↓ 15 min
Senbon Torii → Okusha
    ↓ 20 min
Kumataka-sha Pond
    ↓ 15 min
Yotsuji Intersection ← REST STOP
    ↓ 20 min
Ni-no-mine (Second Peak)
    ↓ 10 min
SUMMIT: Ichi-no-mine (First Peak, 233m)
    ↓ Same route or loop back
START: Main Hall
Note: “First Peak” (Ichi-no-mine) is the summit. “Second Peak” (Ni-no-mine) is lower. Japanese naming counts from the top.
Section-by-Section Guide
Section 1: Main Hall → Okusha
Time: 15-20 min | Difficulty: Easy
| What to expect | Details |
|---|---|
| Path type | Rising path with stone steps |
| Highlights | Senbon Torii (Thousand Gates) |
| Crowds | Heavy until Okusha |
| Facilities | Restrooms at start, vending machines |
At Okusha: Try the Omokaru-ishi stones. This is where most tourists turn back.
Section 2: Okusha → Kumataka-sha
Time: 15-20 min | Difficulty: Easy-Moderate
| What to expect | Details |
|---|---|
| Path type | Stone steps, some steep sections |
| Highlights | Quieter, more torii gates |
| Crowds | Moderate (many turn back at Okusha) |
| Facilities | Restrooms between Okusha and Kumataka-sha |
At Kumataka-sha: A mystical pond shrine. Good rest spot and photo opportunity.
Section 3: Kumataka-sha → Yotsuji
Time: 15-20 min | Difficulty: Moderate
| What to expect | Details |
|---|---|
| Path type | Continuous stairs, some steep |
| Highlights | Views begin to open up |
| Crowds | Light |
| Facilities | TEAHOUSES at Yotsuji |
At Yotsuji: Major rest point with:
- Teahouses (udon, drinks, snacks)
- Benches with city views
- Nearest restroom: Gozendani, about 5 minutes from Yotsuji on the loop (not on the path up to the peaks)
- Decision point: summit or turn back
Section 4: Yotsuji → Summit
Time: 25-30 min | Difficulty: Moderate-Hard
| What to expect | Details |
|---|---|
| Path type | Steepest section, many stairs |
| Highlights | Ni-no-mine, Ichi-no-mine shrines |
| Crowds | Very light |
| Facilities | Small shrines |
At Summit (Ichi-no-mine): Small shrine, sense of accomplishment. Views partially blocked by trees.
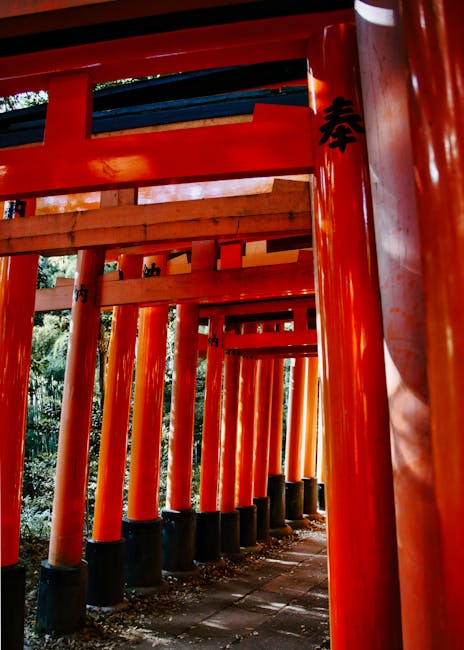
The iconic torii tunnel stretches endlessly up the mountainside, creating a breathtaking corridor of vermillion gates
Facilities Map
Restroom Locations
| Location | Notes |
|---|---|
| Main hall area and Okusha | Before the mountain trail |
| Between Okusha and Kumataka-sha | On the climb to Kumataka-sha |
| Gozendani, on the loop above Yotsuji | Beyond Yotsuji |
Important: On a 2015 map, the restroom between Okusha and Kumataka-sha is the last one before Yotsuji, about a 20-minute climb from there. Use it before you go on.
Vending Machine Locations
| Location | Available |
|---|---|
| Main hall area | Yes – many |
| Near Okusha | Yes |
| Yotsuji | Yes (limited) |
Food & Rest Stops
| Location | What’s Available |
|---|---|
| Yotsuji teahouses | Udon, mochi, drinks, snacks |
| Mitsuji area | Small snack shop |
Route Options
Option A: Okusha & Back (Easy)
Time: 45-60 min | For: Casual visitors, limited time
Main Hall → Senbon Torii → Okusha → Return
- See the famous gates
- Try Omokaru-ishi stones
- Avoid all steep climbing
Option B: Yotsuji & Back (Recommended)
Time: 90-120 min | For: Most visitors
Main Hall → Okusha → Yotsuji → Return same way
- Wide view over the city at Yotsuji
- Teahouse rest stop
- Skip the steepest section
- Best effort-to-reward ratio
Option C: Full Summit (Complete Experience)
Time: 2-3 hours | For: Fit hikers, completionists
Main Hall → Okusha → Yotsuji → Summit → Return
- Full pilgrimage experience
- Sense of accomplishment
- Visit the shrines around the peaks — above Yotsuji the path loops and brings you back to Yotsuji
Option D: Loop Route (Advanced)
Time: 2.5-3 hours | For: Those wanting variety
Main Hall → Okusha → Yotsuji → Summit →
    → From Mitsuji, descend by the north-side path → Return to main area
- Different scenery on descent
- The north-side path branches off at Mitsuji, the junction between Kumataka-sha and Yotsuji, and comes back down past a different pond to the shrine office
- Slightly longer
What to Bring
Essential
| Item | Why |
|---|---|
| Water (500ml minimum) | Limited vending machines up top |
| Comfortable shoes | Long stretches of stone steps – sneakers minimum |
| Small towel | You will sweat |
| Cash | Mountain teahouses may not take cards; Nishimura-tei at Yotsuji takes no cards, IC cards (Suica/ICOCA) or QR payments |
Recommended
| Item | Why |
|---|---|
| Light snack | Energy for the climb |
| Rain jacket | Weather changes fast |
| Small backpack | Keep hands free for stairs |
| Hiking poles | Optional, helpful for knees |
Seasonal Extras
| Season | Bring |
|---|---|
| Summer | Hat, sunscreen, extra water, cooling towel |
| Winter | Warm layers, gloves |
| Rainy season | Umbrella, waterproof bag |
Difficulty Comparison
How does Fushimi Inari compare to other hikes?
| Hike | Difficulty | Comparison |
|---|---|---|
| Fushimi Inari summit | Moderate | Lots of stairs, well-maintained |
| Kiyomizu-dera walk | Easy | Much shorter, mostly flat |
| Arashiyama bamboo | Easy | Flat, no climbing |
| Mt. Takao (Tokyo) | Moderate | Similar difficulty, longer |
| Mt. Fuji | Very Hard | Not comparable |
Fushimi Inari is: Harder than temple visits, easier than real mountain hikes.
Tips for Different Fitness Levels
For Beginners / Less Fit
1. Start early – cooler, less crowded
2. Pace yourself – no rush, take breaks every 10-15 min
3. Target Yotsuji – turn back there after taking in the view
4. Bring extra water – dehydration makes it harder
5. Use the teahouse – rest, refuel, then decide if continuing
For Families with Kids
| Age | Recommendation |
|---|---|
| Under 5 | Okusha max (carry if needed) |
| 5-10 | Yotsuji possible with encouragement |
| 10+ | Summit possible if active |
Tip: Make it a game – count the fox statues or torii gates!
For Seniors / Knee Problems
1. Consider Yotsuji only – steepest section is after
2. Bring hiking poles – reduce knee strain
3. Descend carefully – downhill is harder on knees
Best Times to Hike
| Time | Pros | Cons |
|---|---|---|
| 6:00-8:00 AM | Cooler, calmer than later in the day, beautiful light | Very early wake-up |
| 8:00-10:00 AM | Good light, moderate crowds | Starting to warm up |
| 10:00 AM-3:00 PM | — | Hot, crowded, tiring |
| 3:00-5:00 PM | Cooling down, thinning crowds | In autumn and winter, too late to start the full summit loop |
Best: Early morning (6-8 AM)
Frequently Asked Questions
Q: Can I do the hike in flip-flops/sandals?
Strongly not recommended. The stone steps are uneven. You need closed-toe shoes with grip.
Q: Is there shade on the trail?
Yes, most of the trail is forested. But still bring sun protection for open sections.
Q: Can I turn back anytime?
Yes — turn around wherever you like. Above Yotsuji, the path is a loop around the peaks that brings you back to Yotsuji, and below Mitsuji there are two paths back to the main hall area.
Q: How do I know if I’m going the right way?
Follow the torii gates. They guide you the entire way. Signs at major intersections.
Q: Is it safe to hike alone?
Yes, during daytime. Paths are well-marked and you’ll see other hikers. At night, don’t hike the mountain, alone or in a group.
Q: Are there animals on the mountain?
You may see cats, and you may meet wild animals such as wild boars. The shrine prohibits approaching or feeding wild birds and animals, so keep your distance.
Related Guides
- Fushimi Inari Complete Guide – Full shrine information
- Fushimi Inari from Osaka – Day trip planning
- Fushimi Inari Photography Guide – Best spots & times
- Fushimi Inari Night Visit Guide – After-dark experience
Last updated: September 2026 (crowd, daylight, route and wildlife notes; total distance checked on Kyoto City’s official tourism site in September 2026; restroom locations from guides published 2015-2023; teahouse payment checked September 2026; other details as of January 2026)
Trail conditions may vary by season. After heavy rain, some sections may be slippery. The shrine is open 24 hours but hiking after dark is not recommended.